
How to Plan a Studio Video Shoot
Tue May 2026

Category:
Creating professional video content takes far more than simply turning on a camera. Whether you are filming branded content, interviews, podcasts, social campaigns, product showcases, or educational material, the success of any studio video shoot comes down to preparation.
Careful planning helps creators avoid wasted production time, technical issues, and unnecessary costs while ensuring the final result looks polished and purposeful.
This 10 step guide explores how to organize a smooth and efficient recording studio from choosing the right creative hub and equipment to scheduling, lighting, shot planning, and post-production considerations.
If you’re considering hiring a professional studio space, understanding the planning process beforehand will help you get significantly more value from your session.
Why Planning Matters for a Studio Video Shoot
A well-planned production creates:
- Faster recording sessions
- Better visual consistency
- Stronger storytelling
- Fewer technical delays
- Improved team coordination
- Higher-quality final edits
Without a clear production plan, even experienced creators can lose valuable time adjusting lighting, troubleshooting sound, or improvising shot lists on the day.
Preparation is what separates a stressful shoot from an efficient one.
Step 1: Define the Goal of Your Shoot
Before booking a perfect studio, clarify exactly what you’re producing.
Different content formats require completely different production setups.
For example:
- Product videos need controlled lighting and detail shots
- Interviews require comfortable seating and strong audio capture
- Social clips prioritise vertical framing and fast pacing
- Educational content often benefits from clean backgrounds and teleprompters
- Podcast filming may require multi-camera configurations
Knowing your end goal influences every production decision that follows.
Ask yourself:
- Where will this content be published?
- Who is the audience?
- What tone should the video communicate?
- Will clips be repurposed across multiple platforms?
- Do you need branding elements integrated into the set?
Clear objectives lead to better creative decisions.
Step 2: Select a Space That Fits Your Production Needs
Not all video production studios are designed for the same type of shoot.
When evaluating a space for video studio hire, consider practical production requirements rather than aesthetics alone.
Key Studio Features to Look For
Lighting Flexibility
A professional studio video content studio should allow you to control lighting conditions fully without relying on inconsistent natural light.
Acoustic Quality
Sound treatment is essential for dialogue-driven content. Echo-heavy environments can reduce production quality dramatically.
Space and Layout
Ensure there is enough room for:
- Camera movement
- Lighting stands
- Multiple presenters
- Equipment storage
- Monitoring stations
Power and Connectivity
Studios should provide reliable power access, charging points, and internet connectivity where required.
Equipment Availability
Some studio rental packages include cameras, microphones, lighting rigs, monitors, or technical assistance.
This can simplify logistics and reduce equipment transport requirements.
Step 3: Build a Detailed Shot List
A shot list keeps production organized and efficient.
Rather than improvising throughout the session, map out every scene or segment beforehand.
Your shot list may include:
- Camera angles
- Dialogue sections
- B-roll footage
- Product close-ups
- Wide shots
- Intro and outro segments
- Social media cutaways
Organizing your shoot in sequence helps reduce setup changes and lighting adjustments.
Step 4: Plan Your Lighting Setup
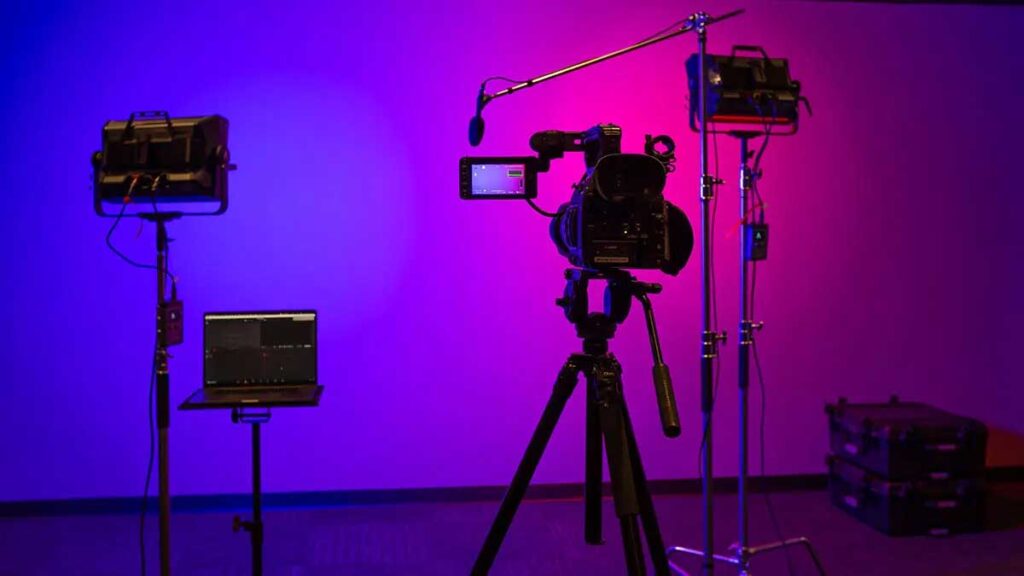
Lighting plays a huge role in determining how professional your footage appears.
A properly lit studio video shoot creates:
- Better skin tones
- Cleaner image quality
- More cinematic depth
- Improved visual consistency
Common Studio Lighting Techniques
Key Lighting
Your primary light source that shapes the subject.
Fill Lighting
Softens harsh shadows and balances exposure.
Backlighting
Separates subjects from the background for a more polished look.
Accent Lighting
Used to add depth, atmosphere, or branding elements to the set.
Different productions require different lighting moods. A corporate interview will typically use softer neutral lighting, while social-first content may use more stylised colour accents.
Step 5: Prioritise Audio Quality
Many creators focus heavily on visuals while underestimating audio.
Poor sound quality instantly lowers perceived production value.
Before your shoot, determine:
- Which microphones are required
- Whether wireless systems are needed
- How many people will be speaking
- If backup audio recording is available
- How room acoustics will affect recordings
A professional content creation studio often provides acoustically treated environments that dramatically improve dialogue clarity.
Step 6: Organise Your Production Schedule
Time management is essential during any studio session.
A structured schedule prevents rushed filming and missed content opportunities.
Include Time For:
- Equipment setup
- Lighting adjustments
- Sound checks
- Presenter preparation
- Multiple takes
- Scene changes
- Backup recordings
- Breaks
Avoid booking overly short sessions. Rushing often leads to avoidable mistakes that become expensive during editing.
Step 7: Prepare Talent and Presenters
Even experienced presenters perform better when properly prepared.
Before filming:
- Share scripts or talking points in advance
- Clarify wardrobe guidelines
- Discuss timing expectations
- Rehearse difficult sections
- Confirm pronunciation of names or terminology
Comfort on camera directly affects audience engagement.
Step 8: Think About Branding and Visual Identity
Your studio setup should support your wider brand identity.
Consistent visual presentation helps audiences recognise your content more quickly across platforms.
Consider integrating:
- Brand colours
- Logo placement
- Consistent framing
- Set styling
- Lighting aesthetics
- Graphic overlays
A cohesive look builds professionalism and strengthens long-term content strategy.
Step 9: Plan for Content Repurposing
A single studio master video reel can generate far more than one final video.
Smart creators maximize production value by capturing extra assets during the session.
Examples include:
- Short-form vertical clips
- Behind-the-scenes footage
- Promotional teasers
- Thumbnail photography
- Social media snippets
- Audio-only podcast versions
- Website content
Planning this in advance ensures nothing important gets missed during filming.
Step 10: Prepare for Post-Production
Good editing begins before filming starts.
Organised production workflows make post-production significantly smoother.
Helpful Preparation Includes:
- Consistent file naming
- Multi-camera sync planning
- Clear audio track labelling
- Backup storage systems
- Shot logging
- Lighting consistency between scenes
The cleaner your recording process, the faster editing becomes.
Common Production Pitfalls During Creator Shoots
Avoiding a few key errors can dramatically improve production outcomes.
Overcomplicating the Setup
Complex productions often create unnecessary delays.
Poor Audio Monitoring
Always monitor sound live rather than assuming recordings are working correctly.
Ignoring Background Details
Small distractions become highly noticeable on camera.
Lack of Scheduling
Disorganized shoots quickly waste studio time.
Insufficient Test Recording
Always review test footage before starting the full session.
Why Dedicated Creator Studios Help Streamline Filming
While home setups can work for some creators, professional studios provide greater control, reliability, and efficiency.
A dedicated studio environment offers advantages such as:
- Controlled lighting conditions
- Acoustic treatment
- Professional-grade equipment
- Technical support
- Multiple filming areas
- Faster setup times
- Cleaner aesthetics
For brands, agencies, podcasters, educators, and content creators producing regular material, a professional studio environment can streamline the entire production process.
Bringing Your In-Studio Production Shoot Together
A successful studio video shoot starts long before recording begins. Careful planning allows creators to maximize studio time, improve production quality, and create more effective content with fewer setbacks.
By focusing on preparation, lighting, sound, scheduling, branding, and workflow, creators can build a production process that feels efficient rather than overwhelming.
Whether you’re filming interviews, podcasts, promotional campaigns, or educational content, investing time into planning will always improve the final result.
If you’re ready to create content in a fully equipped professional environment, now may be the ideal time to book a professional studio.
Studio Video Shoot FAQs
What should I prepare before a studio video shoot?
You should prepare a clear production brief, shot list, filming schedule, scripts or talking points, wardrobe guidance, and equipment requirements before the shoot day.
How long should I book a studio for?
This depends on the complexity of the production. Simple shoots may require only a few hours, while multi-camera or branded productions often need a full day.
Why is lighting important in studio filming?
Lighting affects image clarity, mood, depth, and overall production quality. Controlled studio lighting helps footage appear more professional and visually consistent.
Is professional audio more important than video quality?
Strong audio is essential. Audiences are generally more tolerant of average visuals than unclear or distracting sound.
What equipment is usually included with video studio hire?
Many studios offer lighting rigs, microphones, cameras, monitors, tripods, and technical support, although packages vary between providers.
Can I create social media content during a studio shoot?
Yes. Many creators capture additional short-form content, vertical clips, and promotional assets during the same session.
What type of studio works best for interviews?
Interview productions typically benefit from acoustically treated spaces with flexible lighting and enough room for multiple camera angles.
How do I make my video shoot more efficient?
Detailed planning, structured schedules, organized shot lists, and proper equipment preparation all improve efficiency significantly.
Should I rehearse before filming?
Yes. Rehearsals help presenters feel more comfortable on camera and reduce unnecessary retakes.
Is studio hire worth it for smaller creators?
For creators producing regular content or aiming to improve production quality, professional studio environments can provide excellent long-term value.