
Lighting Setups That Transform Your Portraits
Mon Oct 2025

Category:
When it comes to portrait photography, lighting is everything. The way you position your lights can completely change the mood, texture, and depth of a portrait. Whether you are working in a professional studio or experimenting with flash at home, mastering a few essential portrait lighting setups will dramatically improve your work.
In this guide, we’ll explore some of the most powerful and widely used portrait lighting techniques, break them down into step-by-step setups, and demonstrate how each affects your subject. We’ll also show you how to create these results, using basic gear in order to help you recreate the setups yourself.
Why Lighting Matters in Portraits
Great portraits don’t happen by accident. While the choice of lens, background, and styling all play a role, lighting is the tool that shapes your subject and gives life to the image. Good lighting:
- Adds depth and dimension by controlling shadows and highlights.
- Creates mood, from soft and romantic to dramatic and intense.
- Directs the viewer’s attention to the subject’s eyes or other key features.
- Defines texture and detail, such as skin tone or fabric.
By learning the principles of portrait lighting, you gain the creative freedom to tell stronger visual stories.
Essential Lighting Gear
Before diving into specific setups, let’s cover the basics of what you’ll need:
- Key Light – The main source of illumination (flash, strobe, or continuous light).
- Fill Light – Softens shadows and reduces contrast.
- Back Light / Hair Light – Separates the subject from the background.
- Modifiers – Softboxes, umbrellas, beauty dishes, or reflectors to control light quality.
- Light Stands & Tripods – Keep everything stable and consistent.
If you’re working with limited gear, don’t worry. Many of these setups can be adapted with a single light and a reflector.
1. The Classic 3-Point Lighting Setup
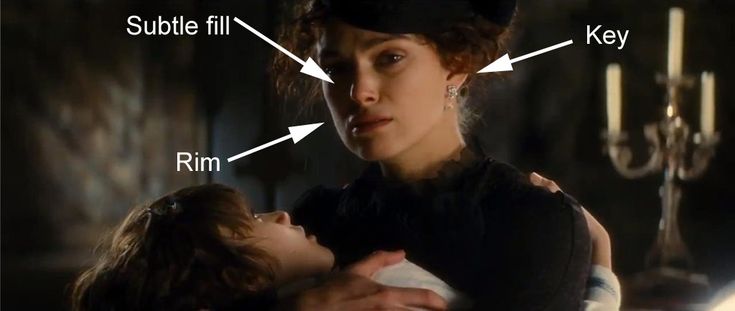
Perhaps the most fundamental of all studio lighting setups, the 3-point lighting guide gives you balance and control. It is widely used in both photography and video.
Setup:
- Place your key light at about 45° to the subject’s face.
- Position a fill light on the opposite side, softer and less intense, to open up shadows.
- Add a back light (or hair light) behind the subject to highlight edges and separate them from the background.
Effect: Creates a professional portrait with depth, dimension, and flattering shadows.
2. Rembrandt Lighting
Named after the painter Rembrandt, this setup is famous for the small, triangular patch of light that appears under the subject’s eye on the shadow side of the face.
Setup:
- Place your key light at about 45° to one side of the subject and slightly above eye level.
- Allow shadows to fall naturally on the opposite cheek, but adjust the angle until you see the triangular highlight appear.
- Use a reflector or fill light if the shadows become too deep.
Effect: Adds drama and mood while still keeping detail in the shadows. Ideal for portraits with a classic, painterly feel.
Butterfly Lighting
Also known as Paramount Lighting, this style was made famous by Hollywood glamour portraits.
Setup:
- Place the key light directly in front of and above the subject, angled down toward their face.
- Look for the butterfly-shaped shadow just under the nose.
- Add a reflector under the chin if needed to soften shadows.
Effect: Produces a flattering, glamorous look with minimal shadows—perfect for beauty and fashion portraits.
4. Loop Lighting
Loop lighting is one of the most versatile and flattering portrait lighting setups for everyday use.
Setup:
- Position the key light slightly higher than eye level, about 30–45° from the subject.
- A small loop-shaped shadow will appear on the cheek opposite the light source.
- Adjust with a fill light or reflector for balance.
Effect: Creates depth without the strong drama of Rembrandt lighting. Suitable for most face shapes.
5. Split Lighting
For bold, high-contrast portraits, split lighting is a go-to setup.
Setup:
- Place your key light at a 90° angle to one side of the subject’s face.
- Half of the face will fall into shadow, while the other half is illuminated.
Effect: Creates a moody, dramatic portrait with strong contrast. Often used in creative or character-driven shoots.
6. High-Key vs. Low-Key Lighting
While not single setups, high-key and low-key approaches are stylistic choices:
- High-Key Lighting: Bright, low-contrast, almost shadowless portraits. Achieved by using multiple light sources and large softboxes. Often used in commercial, fashion, and beauty work.
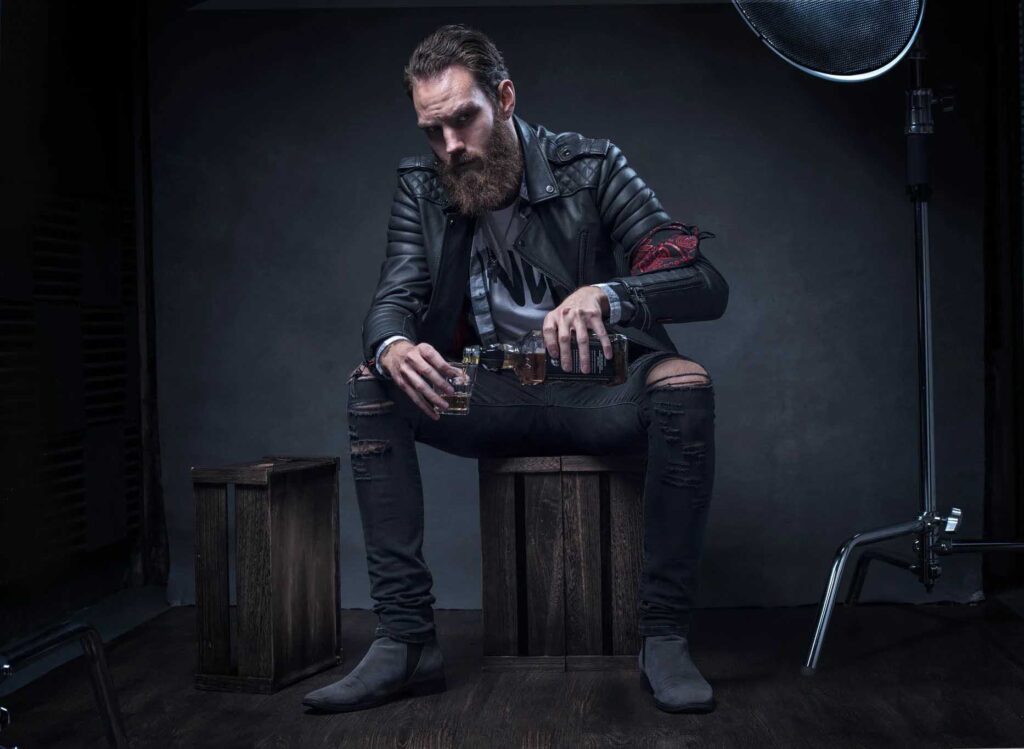
- Low-Key Lighting: Dark, moody, high-contrast portraits. Usually achieved with a single strong light and minimal fill. Perfect for fine art and dramatic editorial portraits.
Tips for Successful Portrait Lighting
- Start simple: Begin with one light and a reflector before adding complexity.
- Watch the eyes: Catchlights (reflections of the light in the eyes) bring life to portraits.
- Control spill: Use flags, grids, or barn doors to prevent unwanted light on the background.
- Experiment: Move lights closer for softer shadows, farther away for harder edges.
- Know your subject: Different lighting setups flatter different face shapes.
When to Use Each Setup
- 3-Point Lighting: Professional headshots, corporate portraits, video interviews.
- Rembrandt: Classic, dramatic portraits or storytelling images.
- Butterfly: Beauty, fashion, glamour shots.
- Loop: Everyday portraiture—reliable and flattering.
- Split: Edgy, creative portraits with mood.
- High-Key/Low-Key: Stylistic projects, from commercial ads to artistic photography.
Next Steps: Learn and Practise
Lighting is a skill that improves with practice. The more you experiment with these setups, the more intuitive it becomes to know which will work for the subject and the story you want to tell.
If you’d like to develop your skills further, our hands-on workshops at dlphoto cover everything from the basics of using flash to advanced portrait lighting setups. You’ll work with professional gear, real models, and receive one-on-one guidance tailored to your level.
In a Photographic Nutshell
Lighting is more than just exposure, it’s the painter’s brush in photography. By learning a few core setups like 3-point lighting, Rembrandt, Butterfly, Loop, and Split lighting, you’ll be equipped with the tools to transform your portraits from flat and ordinary into dynamic, professional, and visually compelling images.
The best way to grow is to set up your lights, shoot, review, and refine. With patience and creativity, you’ll soon find that your lighting becomes a signature element of your style.