
Mastering Portrait Lighting: A Practical Guide for Every Photographer
Mon Oct 2025

Category:
Lighting is the essence of every compelling portrait. Whether you’re working with a simple setup in your living room or a fully equipped studio, understanding how to shape and control light can elevate your portraits from ordinary to extraordinary.
In this guide, we’ll break down essential portrait photography lighting setups, explain how each works, and show you how to adapt them to your own creative vision. By the end, you’ll be able to confidently light your subjects — and know exactly why your lighting choices work.
Tip: This article is part of our Photography Workshops series designed to help photographers build practical skills step by step.
1. Why Lighting Matters in Portrait Photography

Portrait photography isn’t just about capturing a face, it’s about telling a story through light. Lighting affects mood, dimension, and the way viewers emotionally connect with the subject.
- Soft light flatters skin and creates gentle, elegant portraits.
- Hard light emphasises structure and drama.
- Directional light adds depth and form, shaping the subject’s features.
Think of lighting as your paintbrush. A few small adjustments can completely transform how a portrait feels.
2. Essential Gear for Portrait Lighting
Before diving into setups, let’s look at the tools you’ll need. You don’t have to own a professional studio to get started, a few versatile pieces of equipment can take you far.
- Light source: Continuous LED lights or flash strobes.
- Modifiers: Soft boxes, umbrellas, beauty dishes, reflectors, and grids.
- Light stands: To position your lights securely.
- Backgrounds: Seamless paper, fabric, or environmental settings.
- Light meter (optional but helpful): For precise exposure, although most cameras have a built in light meter
Even a single light and a reflector can achieve professional results when used intentionally.
3. Classic Lighting Setups
The following setups are staples in portrait photography lighting. Each one creates a distinct look and can be adapted for your own style.
3.1 Rembrandt Lighting
Named after the Dutch painter, this setup creates a small triangle of light beneath the eye on the shadow side of the face. It’s flattering, moody, and timeless.
- Setup:
- Position your key light at a 45° angle from the subject and slightly above eye level.
- The opposite side should fall into shadow, leaving the signature light triangle.
- Add a reflector or fill light if needed to soften contrast.
- Best for: Character portraits, moody editorial work.
- Tip: Keep the triangle of light no larger than the subject’s eye.
3.2 Loop Lighting
Loop lighting is softer and more approachable, great for everyday portrait sessions. It creates a small shadow of the subject’s nose looping down onto the cheek.
- Best for: Headshots, lifestyle portraits, family photography
- Tip: The light should be soft, nake use of a light box or umbrella for best results
3.3 Butterfly (Paramount) Lighting
Butterfly lighting is named after the butterfly-shaped shadow it creates under the nose. It’s a classic beauty lighting setup often used in fashion and glamour.
- Best for: Beauty, glamour, and fashion portraits.
- Tip: Ideal for subjects with strong cheekbones and symmetrical faces.
3.4 Split Lighting
For maximum drama, split lighting divides the face into light and shadow. It’s often used in artistic and character-driven portraits.
- Setup:
- Key light positioned 90° to one side of the subject.
- Optional fill light or reflector on the opposite side.
- Avoid spill by using a grid or barn doors if necessary.
- Best for: Dramatic portraits, creative projects.
- Tip: Use a black flag or V-flat diffuser to deepen the shadows.
4. Working with Studio Lighting
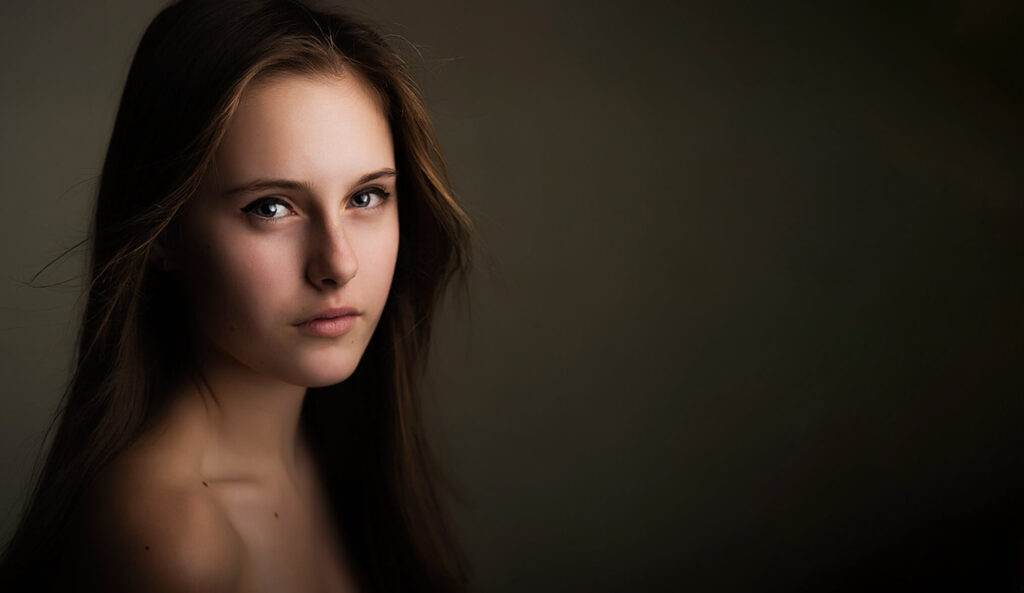
Studio lighting allows for total control over your environment. Unlike natural light, you can fine-tune everything: intensity, direction, quality, and colour temperature.
4.1 One-Light Setup
A single light plus a reflector can create beautiful, professional portraits.
- Place your light in a loop or Rembrandt position.
- Use a white reflector opposite the key to soften shadows.
- Adjust distance and power to balance exposure.
4.2 Two-Light Setup
Adding a fill or rim light gives more depth and separation.
- Key light in loop or butterfly position.
- Second light behind or opposite to separate the subject from the background.
4.3 Three-Point Lighting
A classic commercial setup:
- Key light – main source.
- Fill light – softens shadows.
- Back or hair light – adds separation and polish.
Pro Tip: Start simple. Adding too many lights too quickly can make your images look flat rather than dimensional.
5. Balancing Natural and Artificial Light
Many portrait sessions happen in spaces where natural light mixes with your studio lighting. The key is to control and balance the two.
- Match colour temperatures -Use gels or daylight-balanced lights to avoid colour casts.
- Control ambient exposure – Adjust shutter speed to determine how much natural light enters.
- Use modifiers – A soft box can blend seamlessly with window light.
Example: Position your subject near a window, then add a strobe with a softbox on the opposite side for even, balanced lighting.
6. Common Mistakes and How to Avoid Them
Even experienced photographers can run into lighting challenges. Here are some frequent pitfalls — and how to fix them:
- Harsh shadows under the eyes or chin – Raise your fill or add a reflector.
- Flat lighting with no depth – Increase light angle or reduce fill intensity.
- Overexposed highlights – Lower power, increase distance, or use diffusion.
- Uneven skin tones – Match light temperatures and ensure modifiers are consistent.
Remember: lighting is less about expensive gear and more about placement, control, and understanding how light behaves.
7. Posing and Lighting Work Together
Even the best lighting setup falls short if the pose doesn’t complement it. Here are quick pairing tips:
- Rembrandt or Split lighting -Slight turn of the face towards the light for definition.
- Loop lighting – Keep the subject facing camera with a slight tilt for softness.
- Butterfly lighting – Best with symmetrical, centred poses.
Quick tip: Always direct your subject’s eyes toward the light to add catchlights and life to the portrait.
8. Practice Makes Perfect
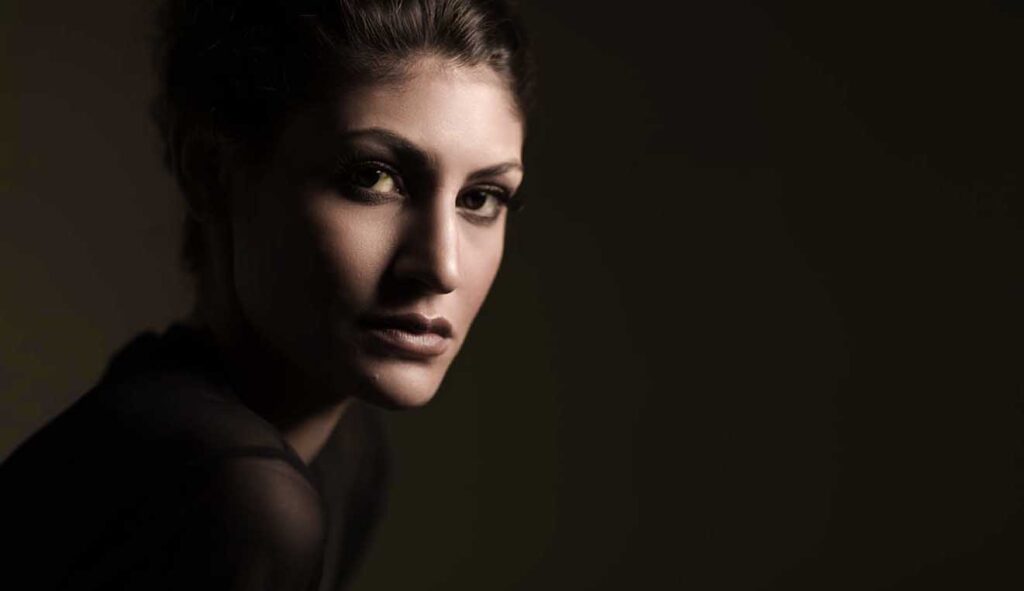
Lighting can feel intimidating at first, but the more you practise, the more intuitive it becomes. Start with one-light setups, master them, and then gradually layer in more complexity.
- Experiment with modifier types (softbox vs. umbrella vs. beauty dish).
- Adjust light distance to see how fall-off affects your subject.
- Switch between hard and soft light to control mood.
If you want to refine your lighting skills faster, consider attending a hands-on session at our Portrait Photography Workshops. Nothing accelerates learning like guided practice.
9. Final Thoughts
Portrait lighting isn’t a single formula, it’s a creative toolset. Once you understand the fundamentals, you can break the rules intentionally to create your own signature style.
Whether you’re capturing intimate headshots or bold editorial portraits, the way you use light defines your photographic voice. Start with the classics, experiment boldly, and watch your portraits come to life.
Checklist for Your Next Portrait Session
Choose your lighting style (Rembrandt, Loop, Butterfly, or Split).
Decide on light modifiers and placement.
Control fill and background lights for depth.
Balance natural and artificial light if needed.
Pose and direct your subject for the best angles.
Review and adjust between shots.