
Outdoor Photography Workshop: Making the Most of Natural Light
Fri Oct 2026

Category:
Taking your camera outdoors means learning to work with whatever the environment throws at you. The light can change within minutes, weather conditions can shift, and a location that looked perfect when you arrived may turn out to be more challenging than expected. These are all part of outdoor photography, and learning to work with them can make a real difference to your results.
One of the trickier aspects for beginners is dealing with natural light. You might see a scene that looks fantastic in person, only to find that your photograph has harsh shadows, blown highlights or a completely different feel from what you had in mind. Recognising why that happens takes practice, observation and a better understanding of your camera.
Expensive equipment and perfect weather won’t solve every problem. Knowing where to stand, how to compose a shot and when to adjust your exposure often matters far more. Once you start paying attention to how light interacts with your surroundings, you have much more control over the images you create.
An outdoor photography workshop gives you the chance to put these skills into practice rather than just reading about them. Working in different locations and making the most of available light helps you develop techniques you can use in landscape, nature, portrait and travel photography.
1. Understanding Natural Light
Natural light changes throughout the day. Its direction, intensity and colour influence how subjects appear, how shadows fall and how much detail your camera can record.
Learning to recognise these changes is one of the most useful skills you can develop as a photographer.
Direct sunlight can create strong contrast, deep shadows and bright highlights. This can work well when you want a dramatic image, but it may make portraits more difficult, particularly when the sun is high overhead.
Cloud cover produces a different effect. Clouds act as a natural diffuser, spreading sunlight more evenly and often softening shadows. This can be useful for portraits, close-up subjects and scenes where you want to retain detail across a wider range of tones.
Open shade is another option. Positioning a subject beneath a tree or beside a building can reduce direct sunlight while allowing softer light to reach the face or subject. However, the colour of nearby surfaces and the direction of the available light can still affect the result.
Rather than assuming that one type of light is always best, consider what suits the subject and the mood you want to create.
During an outdoor session, a useful exercise is to photograph the same subject in direct sunlight, open shade and diffused light. Compare the results and observe how the contrast, colour and overall appearance change.
This simple comparison helps you understand light as a creative tool rather than something you have to accept without adjustment.
2. Making the Most of Golden Hour
Golden hour refers to the period shortly after sunrise or before sunset, when sunlight often takes on a warmer appearance and arrives at a lower angle.
The lower sun can create longer shadows, softer directional light and opportunities for more atmospheric photographs. It is particularly useful for landscapes, environmental portraits and scenes where the quality of the light contributes to the story.
However, golden hour is not a guarantee of a successful image. Weather, cloud cover, the surrounding landscape and the position of the sun all affect the result.
For example, when photographing a person outdoors, placing the sun slightly behind them can create a warm rim of light around their hair and shoulders. Moving the subject a little to one side may reveal more detail in the face while preserving the backlit effect.
For landscape work, low-angle sunlight can emphasise texture in rocks, vegetation and uneven ground. The direction of the light may reveal details that become less noticeable when the sun is directly overhead.
Preparation is important because the light can change quickly. Scout your location beforehand, decide where you want to position yourself and allow time to experiment.
In Cape Town, the surrounding coastline, mountains, parks and urban spaces offer varied environments for practising with changing natural light. The key is to choose a location that suits your subject and gives you room to explore different angles.
3. Working with Backlighting
Backlighting occurs when the main light source is behind your subject relative to the camera. It can produce striking effects, from glowing foliage and illuminated hair to silhouettes against a bright sky.
The challenge is balancing the brightness of the background with the exposure of the subject.
If you expose for the sky, the subject may become dark. If you expose for the subject, the background may lose detail and appear very bright. Neither result is necessarily wrong. The decision depends on your creative intention.
If you want a silhouette, expose for the brighter background and allow the subject to fall into shadow. Choose a recognisable shape and simplify the composition so the outline remains clear.
If you want detail in a backlit portrait, try changing your position or using a reflector to direct some light back towards the subject. You can also use exposure compensation to brighten the image when appropriate, while checking that important highlights are not lost.
Pay attention to lens flare as well. Direct sunlight entering the lens can reduce contrast or introduce bright artefacts. Sometimes this adds atmosphere, but it can also obscure important details. A small change in camera angle may be enough to control it.
Backlighting is worth practising because it encourages you to think about the direction of light rather than simply pointing the camera towards the subject.
4. Getting Exposure Right Outdoors
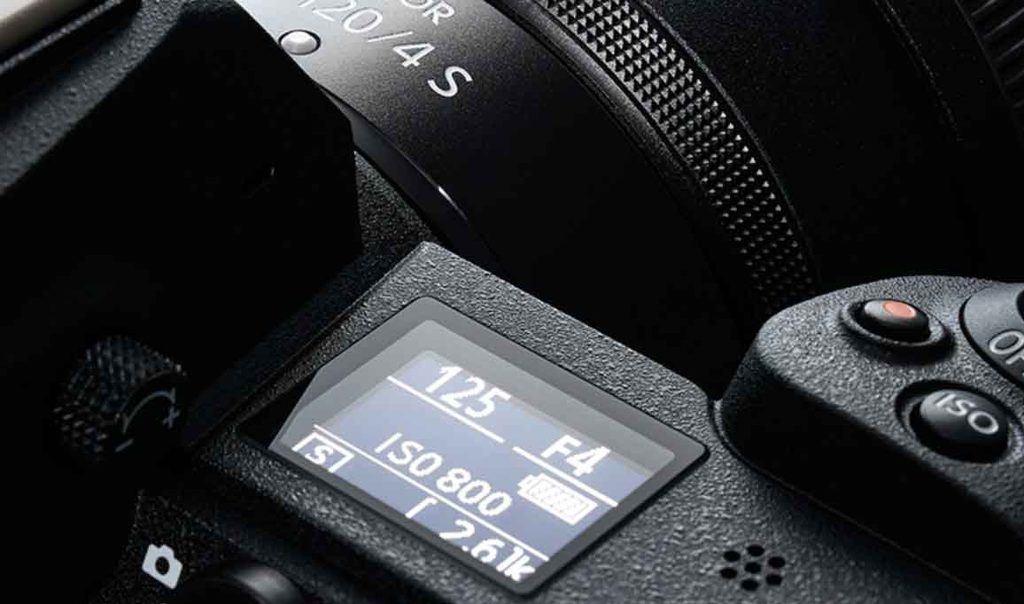
Exposure determines how bright or dark your photograph appears. When working outdoors, you may need to respond to rapidly changing light, bright skies, shaded areas and subjects that move between different lighting conditions.
Three camera settings work together to control exposure:
- Aperture: Controls the size of the lens opening and influences depth of field.
- Shutter speed: Determines how long light reaches the sensor and affects how movement is recorded.
- ISO: Controls the sensor’s sensitivity setting and influences image noise as ISO increases.
Understanding how these settings interact gives you greater control over the final result.
For a landscape, you might choose a relatively small aperture to keep more of the scene in focus. If you are photographing a moving subject, a faster shutter speed may be more important. For a portrait with a softly blurred background, a wider aperture can help separate the subject from the surroundings.
Your exposure also depends on the scene’s brightness and contrast. A camera’s automatic metering can sometimes produce an image that is too bright or too dark, particularly when the frame contains a large area of sky, snow or deep shadow.
Check the image on the rear screen, but do not rely on appearance alone. The display brightness can be misleading. If available, use the histogram to assess tonal distribution and watch for highlights that have lost detail.
Exposure compensation is a useful tool when working in automatic or semi-automatic modes. It lets you make an image brighter or darker without having to adjust every setting manually.
The most important lesson is to understand why an exposure needs adjustment, rather than changing settings at random.
5. Using Reflectors to Control Light
You do not always need additional electronic lighting to improve an outdoor photograph. A reflector can redirect existing light onto a subject, helping to soften shadows or brighten darker areas.
Reflectors are particularly useful for portraits. When sunlight comes from one side, the opposite side of the face may fall into shadow. A reflector positioned to catch the available light can return some of it to the subject, reducing contrast.
Different surfaces produce different effects. A white reflector generally provides softer, more neutral fill, while a silver surface reflects stronger light. Gold reflectors introduce a warmer colour cast, which may or may not suit the scene.
Positioning matters more than simply holding a reflector close to the subject. Move it gradually and observe how the light changes. A small adjustment can make the difference between natural-looking fill and an overly bright patch.
You can also look for naturally reflective surfaces. A pale wall, pavement or sandy area may bounce light back towards a subject, while darker surroundings tend to absorb more light.
When learning these techniques, start with a simple portrait in open shade. Photograph the subject without a reflector, then introduce one and compare the results. This allows you to see how reflected light changes the image without complicating the setup.
6. Choosing the Right Location
Location scouting involves identifying suitable places to photograph before beginning a session. It is not simply about finding an attractive view. The location needs to work with the subject, the available light, the composition and any practical constraints.
Start by considering the purpose of the photograph. A landscape may benefit from an open viewpoint and a clear foreground, while a portrait might work better in a sheltered space with a simple background.
Look for elements that help structure the frame, such as leading lines, natural patterns, contrasting textures or areas of negative space. At the same time, identify distractions that could compete with the subject.
The position of the sun should influence your planning. A location that works well in the morning may produce harsh shadows or backlighting later in the day. If possible, visit beforehand or use a sun-position planning tool to estimate where the light will fall.
For location-based photography around Cape Town, coastal viewpoints, gardens, urban streets and mountain settings each present different challenges. Coastal locations may offer dramatic skies and reflected light, while built-up environments introduce shade, reflections and contrasting backgrounds.
Always consider access, safety, weather exposure and any permissions required for commercial or organised shoots. Some sites have restrictions on tripods, photography equipment or professional activity.
A good location is one that supports the image you want to create and allows you to work comfortably and safely.
7. Adapting to Weather and Changing Conditions
Location-based photographers cannot control the weather, but they can learn to work with it.
Overcast skies can produce soft, even illumination, making them useful for portraits, flowers and other subjects where harsh shadows would be distracting. They may also reduce colour contrast, so consider how the background and subject work together.
Wind introduces movement. This can create energy in photographs of grasses, trees, clothing or people, but it can also make sharp images more difficult to achieve. A faster shutter speed may help freeze movement, while a slower speed can communicate motion when used deliberately.
After rain, reflections and wet surfaces can add visual interest. Clouds may also create temporary breaks in the light, producing dramatic changes across a landscape.
Bright midday conditions are often considered difficult, but they can still work well for strong graphic compositions, architectural details and high-contrast scenes. Look for patterns created by shadows and use them as part of the composition.
When the weather changes, reconsider your original plan rather than assuming the session has failed. A different set of conditions may reveal opportunities you had not anticipated.
Protect your equipment from moisture, dust and strong wind, and avoid exposed locations during dangerous weather. Practical preparation allows you to concentrate on the photography itself.
8. Developing Your Skills Through Practical Experience
Reading about light and exposure provides a useful foundation, but understanding develops when you apply these principles and review the results.
A structured field photography course can help you identify what to look for, experiment with camera settings and understand why particular approaches work in different conditions.
For beginners, it is helpful to focus on a few skills at a time. Start by recognising the direction of the light, then practise exposure adjustments and explore how changes in position affect the composition.
Reviewing photographs afterwards is equally important. Look for areas where highlights have been lost, shadows have become too dark or the subject blends into the background. Consider whether a different camera position, exposure setting or time of day would have improved the image.
During practical sessions, small observations can lead to significant improvements. Moving a subject a short distance into open shade, waiting for a cloud to soften direct sunlight or changing your shooting angle can transform the result without requiring new equipment.
At dlphoto, photography education centres on understanding the decisions behind an image and developing skills that can be applied in different situations. The value of hands-on learning lies in connecting technical principles with what you see through the viewfinder.
Make the Most of Your Next Outdoor Shoot
Working with natural light becomes easier when you learn to observe before you photograph. Notice where the light is coming from, how it changes across the scene and what happens when you reposition yourself or your subject.
Practise in different conditions rather than waiting for perfect weather. Experiment with golden hour, backlighting, open shade and reflected light. Learn to make exposure decisions and choose locations that support your creative intentions.
With time, these observations become part of your photographic process, helping you approach unfamiliar environments with greater confidence.
If you would like to develop these skills through practical guidance, explore credible Outdoor Workshops and Beginner Photography Courses to find an option suited to your current experience.
Frequently Asked Questions About Outdoor Photography
What is an outdoor photography workshop?
An nn-location photography workshop is a practical learning session in which participants develop their skills in real-world environments. Depending on the programme, topics may include natural light, exposure, composition, location selection and adapting to changing weather.
What is the best time of day for outdoor photography?
Early morning and late afternoon often provide softer, more directional light. The period shortly after sunrise or before sunset is commonly called golden hour. However, overcast conditions, open shade and even midday sunlight can be effective depending on the subject and desired result.
How do you take better photographs in natural light?
Start by identifying the direction, quality and intensity of the available light. Position your subject carefully, adjust exposure as needed and watch for distracting highlights or deep shadows. Small changes to your shooting angle can make a significant difference.
What camera settings should beginners use outdoors?
Aperture priority is a useful starting point because it lets you control depth of field while the camera selects a shutter speed. Monitor that shutter speed to avoid blur, and adjust ISO when necessary. As your confidence grows, experiment with manual exposure to understand the relationship between aperture, shutter speed and ISO.
What is the golden hour in photography?
Golden hour is the period shortly after sunrise or before sunset when the sun is low in the sky. It often produces warm tones, longer shadows and softer directional light, making it popular for landscapes and portraits.
How do you photograph a subject against the sun?
First decide whether you want a silhouette or detail in the subject. For a silhouette, expose for the bright background. To retain subject detail, consider using a reflector, changing your angle or adjusting exposure compensation. Check highlights carefully to avoid losing important detail.
Are outdoor photography courses suitable for beginners?
Yes, provided the course is designed for beginners. Look for practical instruction that explains camera controls, exposure, composition and working with available light. A supportive learning environment can help you apply the techniques as you practise.
What equipment do I need for an outdoor photography session?
A camera and suitable lens are the essentials. A spare battery, memory card, lens cloth and weather protection are also useful. A reflector or tripod may help with particular techniques, but neither is necessary for every outdoor session.
How can I find good outdoor photography locations in Cape Town?
Look for locations that suit your subject and the direction of the light. Coastal areas, parks, gardens, urban streets and mountain viewpoints offer different photographic opportunities. Check access restrictions, weather conditions and safety before visiting, particularly if you are carrying equipment or planning a commercial shoot.