
Photography Lighting Basics: A Beginner’s Guide to Understanding and Using Light
Fri Jun 2026

Category:
Great photography begins with great light.
While cameras, lenses, and editing software all play important roles, understanding how light behaves is with out doubt the most valuable skill a photographer can develop. Whether you are capturing portraits, products, landscapes, or creative projects, learning the fundamentals of photography lighting will dramatically improve the quality of your images.
For beginners, lighting can seem intimidating. Terms such as key light, fill light, soft-boxes, reflectors, and studio lighting setups often sound more complicated than they need to be. Fortunately, mastering lighting does not require expensive equipment or a professional studio. It starts with understanding a few core principles and learning how to observe light in the world around you.
This guide explores the essentials of photography lighting, explains common lighting setups, and provides practical techniques that beginners can use immediately to create stronger photographs.
Why Lighting Matters in Photography
Photography literally means “drawing with light”. Without light, there is no photograph.
Light influences:
- Exposure
- Colour accuracy
- Mood and atmosphere
- Texture and detail
- Depth and dimension
- Subject separation
A well-lit image often appears more professional, engaging, and visually appealing, regardless of the camera used. Many beginners focus heavily on camera settings, but understanding how to control and shape light often delivers far greater improvements to image quality.
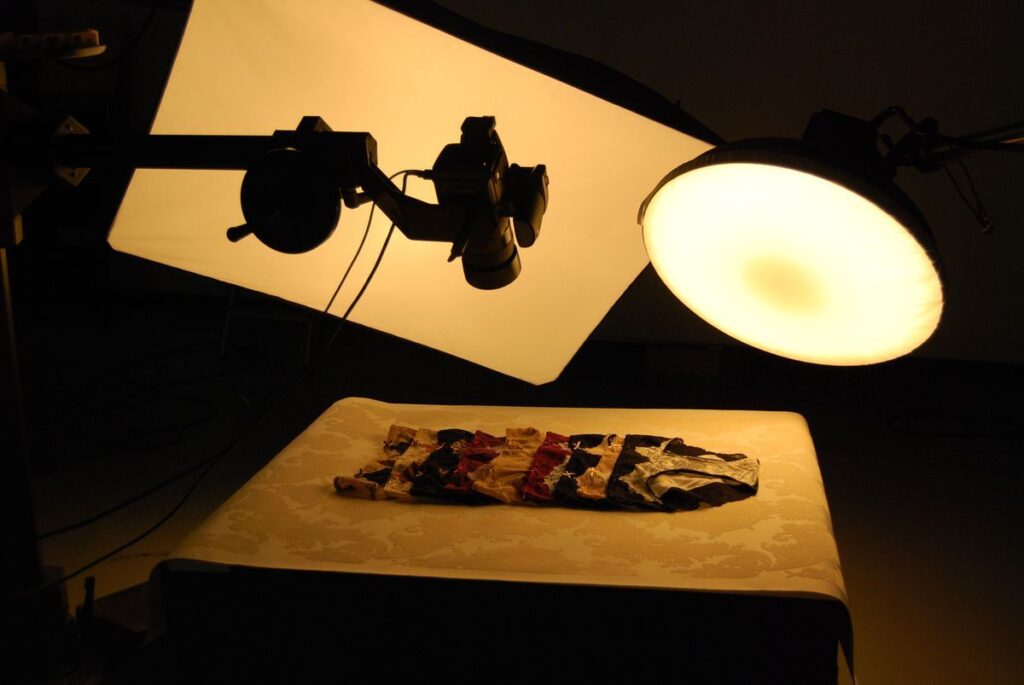
Understanding the Characteristics of Light
Before exploring equipment and setups, it is important to understand the key characteristics of light. let’s keep it simple.
Light Direction
The direction from which light hits a subject affects the appearance of shadows and depth.
Common lighting directions include:
Front Lighting
Light shines directly onto the subject.
Benefits:
- Even illumination
- Reduced shadows
- Simple for beginners
Challenges:
- Can appear flat
- Less texture and dimension
Side Lighting
Light enters from either side of the subject.
Benefits:
- Enhances texture
- Creates depth
- Adds visual interest
Often used in portrait and product photography.
Backlighting
The light source sits behind the subject.
Benefits:
- Creates separation
- Produces dramatic effects
- Can generate silhouettes
Requires careful exposure management.
Light Quality
Light can be categorised as either soft or hard.
Soft Light
Soft light creates gradual transitions between highlights and shadows.
Examples include:
- Cloudy days
- Window light
- Soft-boxes
- Diffused flash
Soft light is often flattering for portraits because it reduces harsh facial shadows.
Hard Light
Hard light creates stronger contrast and defined shadows.
Examples include:
- Direct midday sunlight
- Undiffused flash
- Bare studio lights
Hard light can produce dramatic results when used intentionally.
Light Intensity
Intensity refers to the brightness of a light source.
Adjusting intensity helps photographers control exposure and determine how prominent shadows appear within a scene.
Natural Light Photography Basics
Many photographers begin by working with available natural light.
This approach offers an excellent learning environment because it encourages observation and understanding of how light changes throughout the day.
Golden Hour
Golden hour occurs shortly after sunrise and before sunset.
Characteristics include:
- Warm colour tones
- Soft shadows
- Flattering skin tones
- Reduced contrast
Many photographers consider this the most forgiving time to shoot.
Blue Hour
Blue hour occurs just before sunrise and shortly after sunset.
Benefits include:
- Cooler tones
- Atmospheric lighting
- Ideal conditions for cityscapes and landscapes
Overcast Conditions
Cloud cover acts as a giant diffuser.
Benefits:
- Soft illumination
- Balanced exposure
- Reduced harsh shadows
Cloudy days are often ideal for beginner portrait photography.
Window Light
Window light remains one of the most accessible and versatile lighting tools.
Positioning a subject near a large window can produce professional-looking results without specialised equipment.
Try placing subjects:
- Facing the window
- At a 45-degree angle
- Side-on to the light source
Each position creates a different mood and appearance.
Introduction to Studio Lighting
While natural light is excellent for learning, studio lighting offers greater consistency and control.
A studio environment allows photographers to create predictable results regardless of weather or time of day.
The goal is not necessarily to use more light but to shape it effectively.
Common Studio Lighting Equipment
Understanding basic equipment helps beginners navigate lighting setups with confidence.
Continuous Lights
Continuous lighting remains active at all times.
Advantages include:
- Easy visualisation of shadows
- Beginner-friendly operation
- Useful for photography and video
Flash and Strobes
Flash units emit a burst of light when the shutter is triggered.
Benefits include:
- Greater power output
- Consistent results
- Effective light control
These are widely used in professional studio lighting environments.
Soft-boxes
Soft-boxes diffuse light and create softer shadows.
Benefits include:
- Flattering portraits
- Controlled light spread
- Professional appearance
Umbrellas
Umbrellas help spread and soften light.
They are:
- Affordable
- Lightweight
- Popular with beginners
Reflectors
Reflectors redirect existing light back onto a subject.
They are useful for:
- Filling shadows
- Balancing exposure
- Improving portraits
Reflectors provide one of the most cost-effective ways to improve lighting.
Understanding the Three-Point Lighting Setup
One of the most widely used studio lighting techniques is three-point lighting.
This setup creates balance, depth, and dimension.
Key Light
The key light acts as the primary light source.
It determines:
- Overall exposure
- Main shadow direction
- Visual focus
Fill Light
The fill light softens shadows created by the key light.
Its purpose is not to eliminate shadows entirely but to reduce their intensity.
Back Light
Also known as a rim light or hair light.
Positioned behind the subject, it creates separation between the subject and background.
Together, these three light sources create a polished and professional look.
One-Light Photography Setups
Beginners often assume multiple lights are necessary.
In reality, a single light can produce outstanding results.
A one-light setup encourages photographers to focus on:
- Light placement
- Subject positioning
- Shadow control
This approach builds foundational skills that transfer to more advanced lighting arrangements.

Lighting for Portrait Photography
Portrait photography relies heavily on controlling light to flatter facial features.
Several classic lighting patterns are commonly used.
Rembrandt Lighting
Named after the famous painter.
Characteristics include:
- Triangle-shaped highlight beneath one eye
- Strong depth
- Dramatic appearance
Loop Lighting
Creates a small shadow beside the nose.
Benefits include:
- Natural appearance
- Suitable for most face shapes
- Popular among portrait photographers
Butterfly Lighting
Light is positioned above and in front of the subject.
Produces:
- Symmetrical shadows
- Defined cheekbones
- Glamour-style portraits
These patterns help photographers intentionally shape facial features using light.
Lighting for Product Photography
Product photography requires different considerations.
The objective is often to showcase detail, texture, and colour accurately.
Tips include:
- Use diffused light
- Minimise distracting reflections
- Maintain consistent exposure
- Use white or neutral backgrounds where appropriate
Soft lighting generally produces cleaner commercial-style product images.
Common Beginner Lighting Mistakes
Learning lighting involves experimentation, but avoiding common mistakes can accelerate progress.
Ignoring Shadow Placement
Shadows add depth and dimension.
Attempting to eliminate every shadow often results in flat-looking photographs.
Using Light That Is Too Harsh
Direct flash and midday sunlight can create unflattering shadows.
Consider diffusion techniques whenever possible.
Placing Subjects Too Close to Backgrounds
Distance creates separation and helps achieve a more professional appearance.
Overcomplicating Setups
Many beginners add multiple lights too quickly.
Mastering one light source first often produces stronger results.
How to Practise Photography Lighting
The fastest way to improve is through deliberate observation and experimentation.
Try photographing the same subject:
- At different times of day
- Using different window positions
- With and without reflectors
- From multiple lighting angles
Compare results and note how shadows, texture, and mood change.
Developing an eye for light takes time, but every practice session builds valuable experience.
The Relationship Between Lighting and Camera Settings
Lighting and exposure work together.
When lighting conditions change, photographers often adjust:
- Aperture
- Shutter speed
- ISO
Understanding this relationship helps maintain consistent image quality.
Rather than relying solely on camera settings to solve exposure problems, consider adjusting the light source itself whenever possible.
Building Confidence With Lighting
Every experienced photographer started by learning how light behaves.
The key is not owning expensive equipment but understanding how to observe, control, and shape available light.
As your confidence grows, you’ll begin recognising opportunities everywhere from soft window light at home to dramatic outdoor conditions during sunset.
Strong lighting skills enhance every genre of photography and provide a foundation for long-term creative growth.
Conclusion
Learning photography lighting is one of the most rewarding investments a beginner photographer can make. Whether you are using natural daylight, simple reflectors, or exploring your first studio lighting setup, understanding how light influences a scene will elevate every photograph you create.
Start simple. Observe carefully. Experiment consistently.
As you become more comfortable identifying and controlling light, you will gain the confidence to tackle increasingly complex photographic situations and achieve more consistent results.
Ready to develop your skills further? Explore our photography flash and lighting workshop section and enrol to continue building your photography knowledge.
Frequently Asked Questions
What is photography lighting?
Photography lighting refers to the use and control of light sources to illuminate a subject, create mood, manage shadows, and achieve the desired visual outcome in an image.
Why is lighting important in photography?
Lighting affects exposure, colour, contrast, depth, texture, and overall image quality. Strong lighting techniques can significantly improve photographs regardless of camera equipment.
What is the best lighting for beginner photographers?
Soft natural light, such as window light or overcast daylight, is often the easiest and most forgiving option for beginners.
What is studio lighting in photography?
Studio lighting uses controlled artificial light sources, such as strobes, flashes, softboxes, and continuous lights, to create consistent and repeatable photographic results.
What is a key light in photography?
A key light is the primary light source in a lighting setup. It determines the overall illumination and shadow direction of the subject.
What is three-point lighting?
Three-point lighting consists of a key light, fill light, and back light. This setup creates balanced illumination and helps add depth and separation.
What is the difference between hard light and soft light?
Soft light produces gentle shadows and smooth transitions, while hard light creates stronger contrast and more defined shadow edges.
Can I learn photography lighting without a studio?
Yes. Many photographers begin by using natural light from windows, open shade, and outdoor environments before moving into studio-based lighting techniques.
What lighting setup is best for portraits?
A simple one-light setup using soft, diffused light is often ideal for beginners. Popular portrait lighting patterns include Rembrandt, loop, and butterfly lighting.
How can I improve my lighting skills?
Practice observing light in different environments, experiment with light direction and modifiers, and photograph the same subject under varying lighting conditions to understand how light affects the final image.