
The Basics of Camera Settings for Beginners
Wed Oct 2025

Category:
A complete beginner-friendly technical guide explaining ISO, shutter speed, and aperture with practical examples, easy-to-understand tips, to help you shoot with confidence.
The Basics of Camera Settings for Beginners
Learning to shoot in manual mode might seem intimidating at first, but once you understand how the three key camera settings; ISO, shutter speed, and aperture work together, photography becomes far more creative and rewarding. This guide breaks down each setting in a practical and easy-to-follow way, showing you how to take control of your camera, whether you’re a complete beginner or just switching from Auto mode.
If you’ve ever wondered why your photos are too dark, too bright, or blurry, this article will help you fix that and give you a strong foundation to grow from.
(At the end, you with find a Camera Settings Cheat Sheet to keep with you when you’re out shooting.)
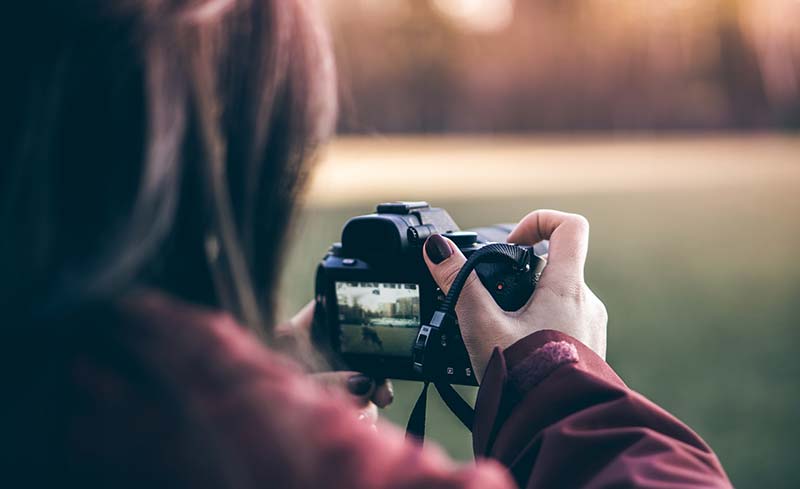
1. Why Understanding Camera Settings Matter
When you first pick up a camera, it’s tempting to stay in Auto mode and let the camera do the thinking. But the moment you learn manual control, you’ll realise how much creative freedom you’ve been missing.
Your camera doesn’t know your artistic vision, whether you want to blur the background, freeze action, or capture dramatic low-light shots. Understanding your camera settings lets you make those creative choices yourself, and “take control of the wheel”.
In simple terms:
- ISO controls how sensitive your camera sensor is to light.
- Shutter Speed works in conjunction with the movement of your subject.
- Aperture affects how much light enters through the lens, your depth of field and the compensation – over or underexposing the image.
Together, these form what photographers call the Exposure Triangle.
2. ISO Explained: Brightness Starts Here
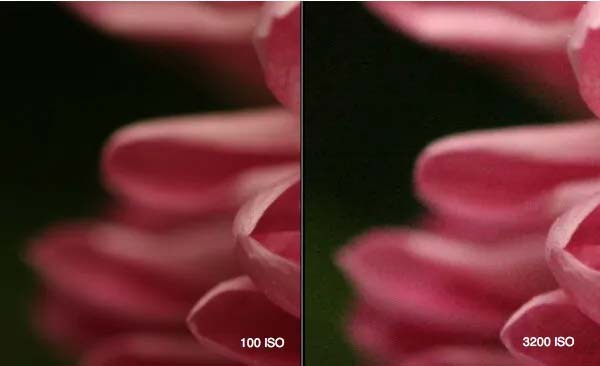
ISO controls your camera’s sensitivity to light.
- Low ISO (100–400): Best for bright conditions, like daylight. Produces clean, crisp images with little to no noise (grain).
- Medium ISO (800–1600): Ideal for indoor or cloudy settings. Some noise may appear but still manageable.
- High ISO (3200+): Useful for night photography or low-light scenes but can cause visible grain or digital noise.
Tip:
Always start with the lowest ISO possible for your environment. Only increase it when you need more light, for example, shooting indoors or at night without a flash.
Example:
At the beach on a sunny day, ISO 100 is perfect. Shooting in a dimly lit café? Try ISO 800–1600.
3. Shutter Speed: Freezing or Blurring Motion
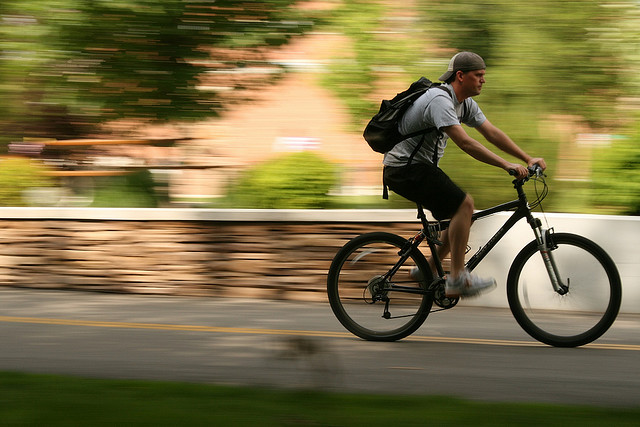
Shutter speed is how long your camera’s shutter stays open to let in light. It’s measured in fractions of a second (like 1/125 or 1/1000).
- Fast Shutter Speeds (1/500 – 1/4000): Freeze motion. Great for sports, wildlife, or kids running around.
- Medium Speeds (1/160 – 1/250): Ideal for everyday scenes and portraits.
- Slow Speeds (1/2 – 1/30 or slower): Capture motion blur such as flowing water, car trails, or night skies.
Tip:
If you’re handholding your camera, keep your shutter speed at 1/60 or faster to avoid blur from camera shake. Just make sure you use a tripod to stabilise the the camera to avoid movement.
Example:
To capture a sharp photo of a cyclist, try 1/500 or faster. For silky waterfall shots, use 1/4 or slower with a tripod. Try avoid holding the camera with a shutter speed less than 1/125.
4. Aperture: Depth and Drama
Aperture is the opening in your lens that lets in light. It’s measured in f-stops (like f/1.8, f/4, f/8, f/16).
- Wide Aperture (f/1.4 – f/2.8): Lets in lots of light and creates a blurred background (shallow depth of field). Perfect for portraits.
- Medium Aperture (f/4 – f/8): A balance between light and depth, ideal for general photography.
- Narrow Aperture (f/11 – f/22): Keeps everything in focus, great for landscapes.
Tip:
Think of aperture as your storytelling tool. Use a wide aperture to isolate your subject. Use a narrow aperture to show the whole scene in detail. Similar to how the iris opens wide in deep sahde or darker surroundings, and closes when in bright lighting environments.
Example:
Portrait at f/2.8 – soft, dreamy background.
Mountain landscape at f/16 – everything sharp from front to back.
5. The Exposure Triangle: Balancing It All
Each setting; ISO, shutter speed, and aperture affects your exposure (how bright or dark your image is). Change one, and you’ll likely need to adjust the others to maintain balance.
For example:
- If you increase shutter speed (less light), you might need a higher ISO or wider aperture to brighten the image.
- If you open the aperture (more light), you can use a lower ISO for cleaner results.
It’s all about trade-offs: You decide what’s most important for your shot: brightness, motion, or depth.
6. How to Practise and Master Manual Mode
Learning these settings takes a bit of trial and error, but here’s a practical way to start:
- Set your camera to Manual (M).
- Choose a fixed subject (like a coffee cup by a window).
- Start with ISO 100, aperture f/4, and shutter speed 1/125.
- Take a photo.
- If it’s too dark, slow down your shutter or widen your aperture.
- If it’s too bright, speed up your shutter or narrow your aperture.
Repeat until you can predict what each change will do. That’s when you start shooting with confidence instead of guessing.
7. Common Beginner Mistakes (and How to Avoid Them)
Mistake 1: Leaving ISO too high.
Fix: Always lower it once you move into brighter conditions.
Mistake 2: Using slow shutter speeds without a tripod.
Fix: Stick to 1/60 or faster when handholding.
Mistake 3: Thinking “Auto” is safer.
Fix: Use Auto only for quick snapshots , definitely not when you’re learning or creating intentionally.
Mistake 4: Ignoring light direction.
Fix: Even perfect settings won’t save poor lighting. Move your subject or use reflectors for balance.
8. Camera Settings Cheat Sheet
To make learning even easier, we’ve put together a Camera Settings Cheat Sheet for you:

It summarises:
- ISO ranges and when to use them
- Recommended shutter speeds for different scenarios
- Aperture guide for portraits, landscapes, and low light
- Quick exposure balancing tips
Keep it in your camera bag or save it on your phone , it’s the perfect pocket guide when shooting on location.
9. Take It Further: Join a Hands-On Beginner Course
If you’d like to take your photography to the next level, there’s no substitute for hands-on guidance.
Our Know Your Camera Course is designed to help you understand your camera and apply these settings in real-world scenarios. You’ll get one-on-one feedback, real-time demonstrations, and practical assignments that build your confidence behind the lens.
Key Learnings
Understanding camera settings isn’t about memorising numbers — it’s about seeing light, motion, and focus differently. Once you grasp how ISO, shutter speed, and aperture interact, you’ll stop relying on luck and start creating intentionally.
So next time you head out to shoot, switch off Auto mode, experiment with your settings, and watch your photography transform.